July 29, 2012

Zak and TJ are 7!!

HAPPY BIRTHDAY!!

Click below to see pics of the celebration
We all love you guys sooooo much!

Nothin' But Fruit


Honestly these are nothing but fruit frozen and boy were they refreshing a sweet. The idea for these comes from nourishing meals.com Ali used blended watermelon in hers and recommended using a honey dew melon if you have one. I did, so that is what I used. 


To make them simply slice fruit and stick it into the popsicle molds. I sliced up 1 and a 1/2 kiwis, 2 strawberries, and add a handful of blueberries. That seems to fill much of the space in the molds nicely. Then I cut up my honeydew melon which was very sweet and blended it until it was liquidy. Then I  just poured that in and around all the sliced fruit in the mold. Freeze the mold for a few hours and presto, a cool summer treat you can offer to your family and feel great about it!


Yum! Can I have another one? 
YES!

July 5, 2012

Summer has just begun...

and we're having so much fun...

Hangin' out at the skateboard parks with the bike

Making underwater friends at the Zoo.

Going around and around and around on the carousel.

Playing hide-n-seek.

swimming lessons.

Going an expeditions.

Doing amazingly hard puzzles.

Going boating with Dad.

making new doggie friends.

Learning to sea kayak...and the summer has just begun. Hope you are having a great summer too!!

July 4, 2012

Seashell Candles

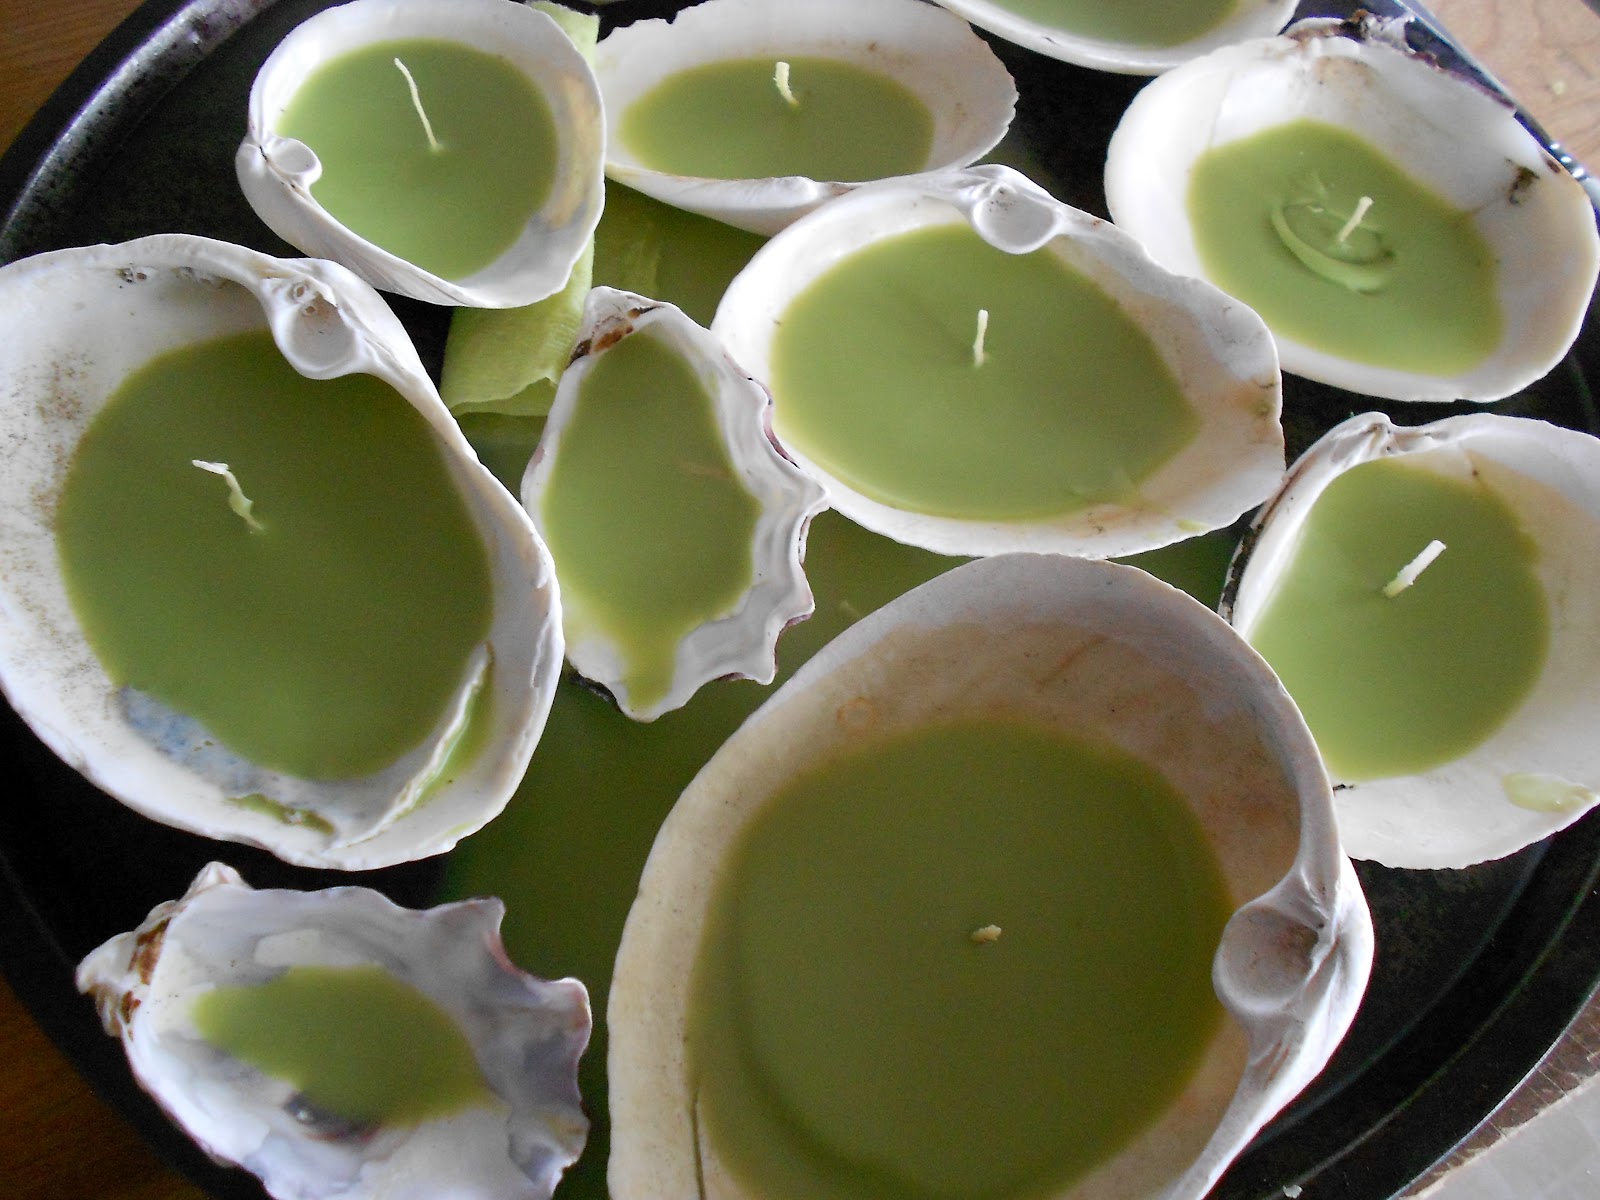
In a recent post I mentioned that the boys went walking along the beach and gathered up piles of shells and things along the shore. They let me take some of these shells so I could make them into candles.


I bought a few tea light candles to make the project a little quicker. I like green this spring so my tea lights are green. They also have a subtle scent to them which is nice. With a perry knife I took out the candle part and left the outer plastic holder and the metal wick stabilizer.


Then, I placed the shells (that had been cleaned) onto a cookie sheet and added a tea light and the wick in the middle of each shell. Then I added extra wax to fill the shell up.


Next, I placed the shells with wax in them into a warm oven until the wax mostly melted.


Here is the tricky part...getting then out of the oven with our spilling the now melted wax. Once they are out I stabilized the wicks which were trying to fall down with a wooden spoon and a clothes pin. You can also wait until the wax is about half solidified and stick a wick into it then. 


Once they are solid they are good to go. I used mine in the bathroom and in the kitchen.